Sewing Tips that Don't Need a Machine
By – houseofdezignadm
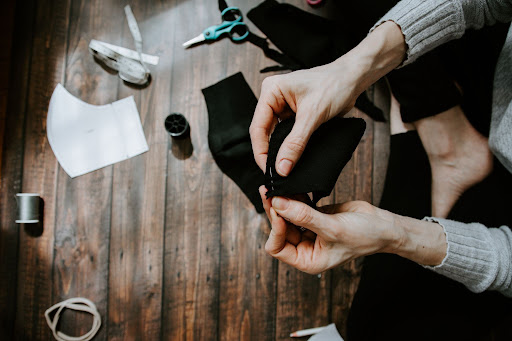
Have you ever sat down at your machine to start a project and realized that you were out of new needles? It is much less likely to happen with hand sewing. Yes, that’s a fact. Moreover, even if a dress is made from a sewing machine, you would still need hand sewing for the buttons. It’s because we can not physically take the sewing machine with us everywhere we go. Hence, knowing how to do a few quick fixes by hand can sometimes be a life-saver.
Hand sewing is useful, especially when you are working with elegant fabrics, or while making a small repair.
Whether you have a sewing machine or not, hand sewing is an important skill for everyone and will always be beneficial if you have it. Moreover, we can also use hand sewing for bigger projects, too. The truth is, anyone can learn to sew by hand. It may take a while to master the basics of hand sewing, but if you are contributing enough time and effort in it, you will learn it.
By knowing the basics of hand sewing, you can quickly repair your old clothes and finish up the small projects. Moreover, even if you have a sewing machine, sometimes hand sewing is the best way to get the results you want. Learning hand sewing techniques will require just a few basic tips which you can also learn with the help of a professional tailoring course
Here are some simple tips and tricks that would help you improve your hand sewing skills
1. Threading a Sewing Needle
Threading a sewing needle can be a frustrating task. But, a few tricks could be the lifesaver. Placing a white background behind the needle will make it easier to see thread and needle. Use sharp scissors to cut the thread at a 45-degree angle. And be sure to clot the thread using water, or wax.
2. Using a Needle Threader
Don’t worry if you don’t actually know how to thread a needle with a threader. Here are some steps to use it.
- Hold the handle of the threader with your thumb and index finger.
- Guide the diamond-shaped wire through the eye of the needle.
- Let the thread pass through the diamond-shaped wire, holding the thread in one hand.
- Remove the needle from the needle threader handle. After this, the thread will pass through the eye of the needle.
3. Choosing The Right Size Of The Needle
A needle is a key to sewing. Whether it’s hand sewing or machine sewing, you need to understand the right kind of needle for your sewing project as you can never continue sewing without it. Please select the size according to the weight of the fabric and the type of thread. It is also suggested that for finer sewing patterns, the size of the needle should be larger.
4. Using The Right Thread For The Right Fabric
Choosing the right thread is the first important step for any sewing project. And for selecting the right sewing thread, you may want to know which type of thread would be more suitable for specific fabrics. Thread comes with different characteristics and thicknesses. The thicker your thread is, the more visible your stitches will be. For sewing thicker fabrics, use thicker threads, it will strengthen the final product.
5. Waxing The Thread
When you wax the thread, it will help you to do tasks that require a little extra strength. Waxing will make your rough thread smoother that helps it to slide through the fabric more easily. It also prevents the thread from sharp twists and being knotted. This tip is useful when you work with threads like linen and cotton.
6. Knot At The End Of Sewing Thread
Making a thread knot is the easiest and additional thing at the start of sewing. It will do the simple job of locking the stitches. Making a knot will prevent your sewing from getting undone. The physics behind this is to maintain the effect of the “twisting method” that is performed at the time of manufacturing of thread.
7. Iron The Fabric First Before And After Sewing
Ironing the fabric before and after completing a project is a factor we should not miss out. It is a preferred tip to make your sewing project look more professional. Ironing the fabric before sewing gives it a more accurate measurement. While ironing the fabric after the project is finished would give it a polished look.
8. Sewing Running Stitches
Running Stitches are done by moving the needle and thread up and down the cloth with the same distance in between two stitches. Normally, after sewing stitches, we can see more threads at the front than at the bottom of the fabric. It is suggested to keep the length of the stitches as same as possible. Keep the stitches in line to make your work look beautiful.
9. Backstitch Sewing
Backstitch done by hand is stronger and more reliable than normal stitch. It is generally used to replace zippers. You can learn backstitching with a few simple steps.
- Insert the needle into the fabric.
- Pull the needle back to two layers of fabric before the previous stitch.
- Put the needle back into the fabric in the middle of the first stitch.
- Raise the needle through the fabric as when sewing the first stitch.
- Making a continuous line of back stitches.
will help you to learn these crucial basics in expert guidance.
2021 fashion trends include designs, fabrics, and colors
for imaginative, beautiful, and comfortable clothing
like the modern kimono.
Call us today at 973-908-3575
or visit us at houseofdezign.com
to learn more about making a modern kimono
with us!